Most Git advice gives you a comforting rule: merge is safe, rebase is dangerous. That rule creates a lot of ugly repositories.
The better rule is simpler. Merge preserves what happened. Rebase preserves what matters. If you're cleaning up your own feature branch before other people depend on it, rebasing isn't reckless. It's disciplined. It turns a noisy work log into a readable project history.
That matters more than people admit. A clean history helps reviewers understand intent, helps maintainers debug regressions, and helps new teammates figure out why the codebase looks the way it does. It also matters for documentation repos, where a pile of merge commits and tiny fixups makes MDX changes harder to track than they should be.
Table of Contents#
- Why Rebase Is Your Secret Weapon for a Clean Git History
- The Critical Decision Rebase vs Merge
- The Standard Rebase Workflow A Step-by-Step Guide
- Mastering Interactive Rebase for Cleaner Pull Requests
- Navigating Conflicts and Force-Pushing Safely
- Team Workflows and Documentation Best Practices
Why Rebase Is Your Secret Weapon for a Clean Git History#
git rebase isn't some exotic power tool. It's been part of Git since Git 1.0.0 on April 7, 2005, and its use has grown with modern development workflows. A 2022 Stack Overflow Developer Survey found that 67% of professional developers regularly use git rebase for feature branch updates, up from 52% in 2018, which tells you this isn't a niche habit anymore (Git book reference).

What rebase gives you is a linear story. Instead of reading a branch graph full of side trips, temporary merge commits, and “sync with main” noise, you see a sequence of decisions. That's a better format for code review and a better format for maintenance.
This is especially useful when you're treating your repository as a record of product decisions, not just a file sync mechanism. In documentation-heavy projects, clean commit history helps teams reason about version changes, publishing decisions, and rollback points. If you care about docs lifecycle discipline, this piece on documentation versioning strategies is worth pairing with a rebase-first workflow.
Practical rule: Rebase isn't about making the graph pretty. It's about making future debugging less expensive.
A messy history always costs someone later. Usually it's the reviewer, the on-call engineer, or the teammate who inherited your branch six months after launch.
The Critical Decision Rebase vs Merge#
Before you run a command, decide what kind of history you want to leave behind. That's the fundamental choice.
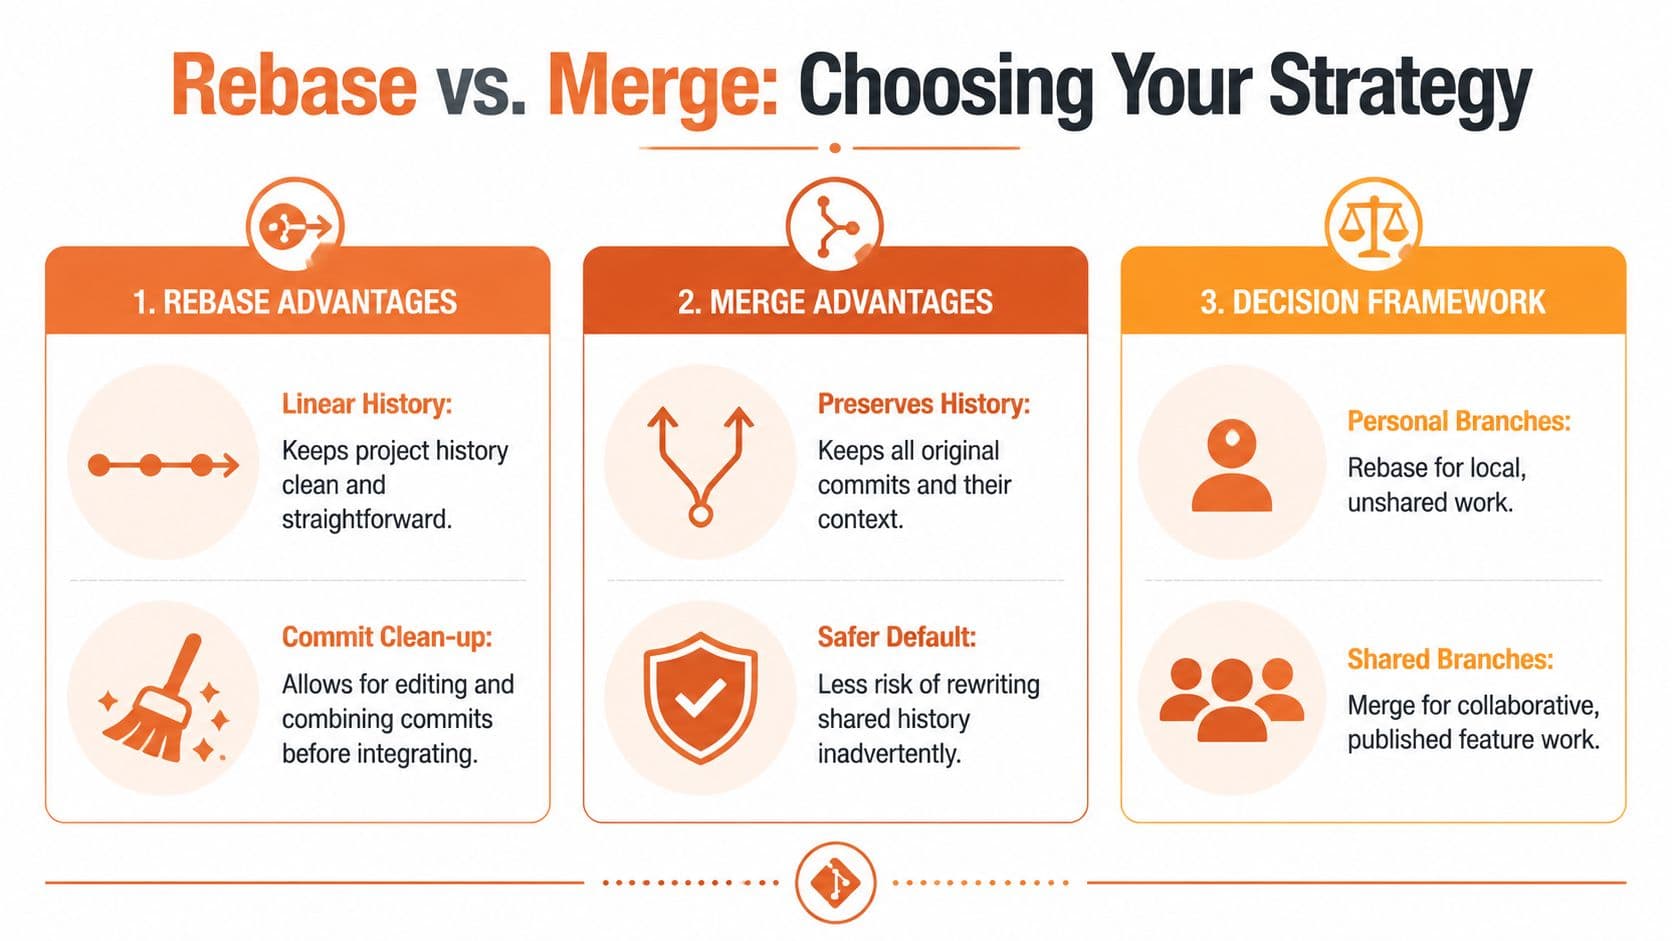
What merge preserves#
git merge keeps the original branch structure intact. That's useful when you want the repository to show exactly how parallel work happened.
Merge is usually the safer default for shared branches because it doesn't rewrite commit history. If two developers have already pulled a branch, merging avoids the awkward cleanup that follows a rewritten remote branch.
Use merge when:
- The branch is already public: Other people may have based work on it.
- The exact branch topology matters: You want a record of how work landed across multiple streams.
- You need the least surprising collaboration model: Junior teams often make fewer mistakes with merge-first shared branches.
What rebase optimizes for#
git rebase takes your branch commits and replays them on top of a newer base. The result looks like your work happened after the latest main changes, in order.
That gives you a history that's easier to scan in git log, easier to bisect mentally, and easier to review in a pull request. It also lets you clean up commits before you ask someone else to read them.
Rebase is the stronger option when:
| Situation | Better choice | Why |
|---|---|---|
| Local feature branch | Rebase | You can rewrite freely before sharing |
| Shared integration branch | Merge | Avoid rewriting history others depend on |
| PR cleanup before review | Rebase | Makes the review path clearer |
| Audit of exact collaboration flow | Merge | Keeps branch structure visible |
A private branch is your workshop. A shared branch is a public contract.
The rule that works in practice#
The rule I recommend is blunt because blunt rules prevent damage.
- Rebase your own unpublished work
- Merge published shared history
- Never rebase
main - Don't force-push unless you understand exactly who will be affected
A lot of rebase disasters come from applying the tool in the wrong social context, not from the command itself. Teams say “rebase is dangerous” when what they usually mean is “rewriting shared history without coordination is dangerous.”
That's true. But it doesn't mean you should give up the benefits of rebase branch in git workflows. It means you should use rebase where it belongs: local cleanup, branch refreshes, and pre-PR history shaping.
The Standard Rebase Workflow A Step-by-Step Guide#
The most common use of rebase branch in git is straightforward. You have a feature branch. main moved on. You want your work to sit cleanly on top of the latest base before review or merge.
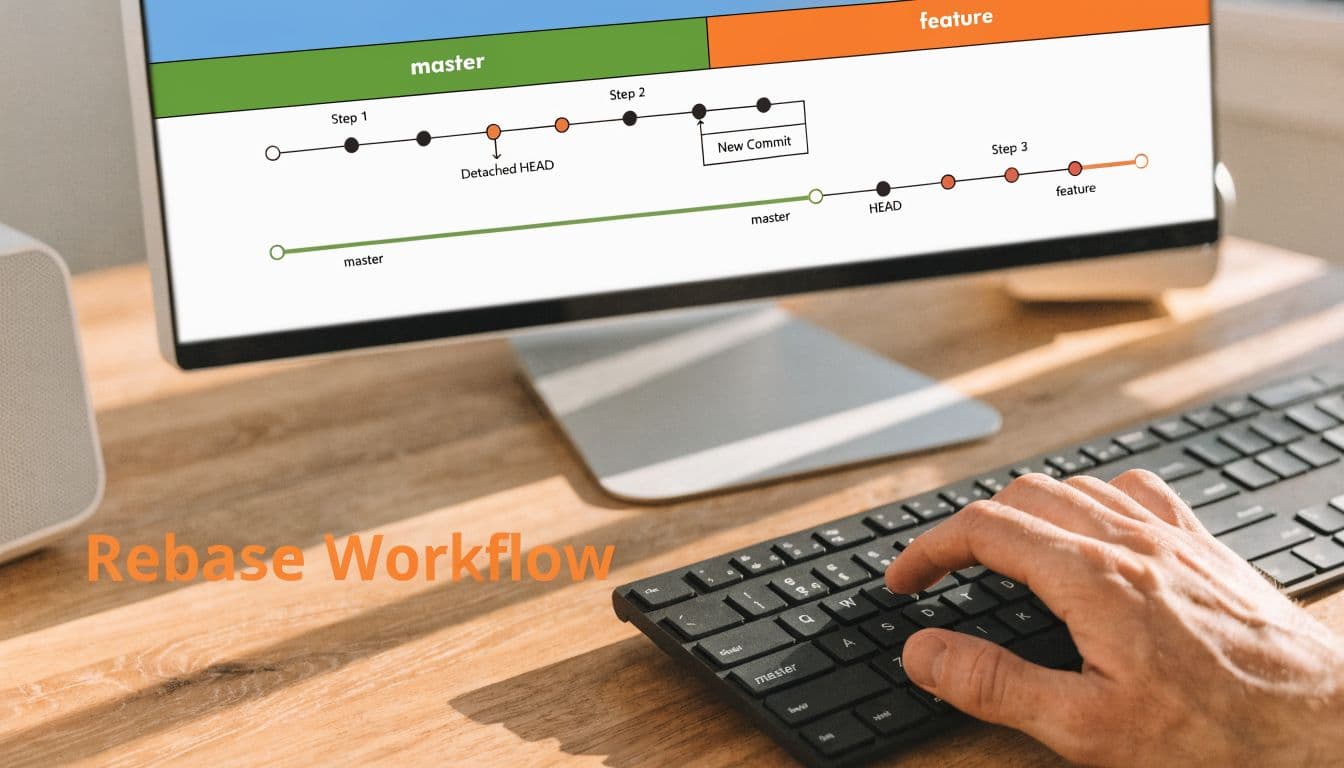
The underlying mechanics matter because they explain both the elegance and the risk. During a rebase, Git identifies the common ancestor, detaches HEAD, fast-forwards the branch pointer to the target tip, and then reapplies your divergent commits as new commits. On a branch with 50 commits, rebasing can be up to 5 times faster than merging in modern Git versions, according to this Git rebasing overview.
What Git is actually doing#
Say your branch has three commits on top of an older main.
Git will:
- Find where your branch and
mainsplit. - Save the changes introduced by your branch commits.
- Move your branch to the latest
main. - Reapply those saved changes one commit at a time.
That means the final file state may match a merge, but the commit identities change. That's why rebasing rewrites history.
If you understand “replay my commits on top of a new base,” rebase stops feeling magical and starts feeling predictable.
A safe default workflow#
Start with a clean working directory. If you have uncommitted edits, stash them or commit them first.
Use a sequence like this:
git status
git checkout main
git pull origin main
git checkout feature-branch
git rebase main
Each step has a purpose.
git statuschecks whether your working tree is clean.git checkout mainmoves you to the target branch.git pull origin maingets the latest upstream changes.git checkout feature-branchreturns to your work.git rebase mainreplays your feature commits onto the updated base.
If it completes cleanly, your branch now sits on top of the latest main without a merge commit. That's usually the version you want reviewers to see.
For a broader workflow discipline around engineering tasks and repeatable operating checklists, this step-by-step guide complements the same mindset.
A quick visual walkthrough helps if you're teaching a teammate or want to see the command flow before trying it:
After a successful rebase, inspect the history before you push. git log --oneline --graph is often enough. You're checking one thing: does the branch now tell a coherent story?
Mastering Interactive Rebase for Cleaner Pull Requests#
A standard rebase changes where your branch sits. Interactive rebase changes how your branch reads.
That's the difference between a branch that merely works and a branch that another engineer can review quickly. If your history says “WIP”, “fix typo”, “try again”, and “really fix test”, you're making the reviewer reconstruct your thinking from scraps.

Interactive rebase with git rebase -i gives you that control. Teams that use it effectively reduce the average number of commits per feature branch by 35%, from roughly 12.4 down to 8.1, which improves readability and CI/CD efficiency according to this interactive rebase reference.
The commands that matter most#
When you run:
git rebase -i mainGit opens a list of commits and lets you decide what to do with each one.
The most useful commands are:
pickkeeps the commit as-is.squashcombines the commit with the one before it and lets you edit the combined message.fixupcombines it too, but discards the extra message. Great for tiny follow-up fixes.rewordkeeps the code change but lets you rewrite the commit message.dropremoves the commit entirely.
A practical cleanup pattern#
A messy branch often looks like this before review:
pick a1b2c3 add API error handling
pick d4e5f6 fix typo in response schema
pick g7h8i9 address review comment
pick j1k2l3 remove debug log
What it should usually become:
pick a1b2c3 add API error handling
fixup d4e5f6 fix typo in response schema
fixup g7h8i9 address review comment
fixup j1k2l3 remove debug log
Now the pull request tells one story. The feature was added. The noise is absorbed.
A pull request isn't your diary. It's a handoff document for another engineer.
Use squash when the message history matters, such as combining two meaningful commits into one polished explanation. Use fixup when the later commit is just cleanup. Use reword when the code is fine but the message is vague, misleading, or lazy.
A few habits make interactive rebase much safer:
- Do it before review when possible: The earlier you clean history, the fewer people depend on the old shape.
- Keep commits logically grouped: One commit per meaningful change is still the right target.
- Don't over-polish into giant blobs: A single 2,000-line commit is not “clean.” It's opaque.
- Read the final log: If each commit message answers “what changed and why,” you're done.
Interactive rebase is one of the clearest signs that a developer respects the future maintainer. In many teams, that's the difference between a tolerable PR and a professional one.
Navigating Conflicts and Force-Pushing Safely#
Rebase gets intimidating when Git stops mid-stream and tells you there's a conflict. That's the moment where people either learn the process or swear off rebase forever.
The process is manageable if you treat it as a loop, not a crisis.
How to resolve a rebase conflict without panic#
When a conflict happens during rebase, Git pauses on the specific commit it couldn't replay cleanly. Your job is to resolve that commit, mark it resolved, and continue.
The working pattern is:
git status
# edit conflicted files
git add <resolved-files>
git rebase --continue
If you get lost, stop digging.
git rebase --abortThat returns you to the pre-rebase state. Use it. There's no prize for suffering through a broken rebase when starting over would be faster.
A calm checklist works better than improvisation:
- Read what Git says: It usually tells you which files are in conflict.
- Open the file and resolve intentionally: Don't just remove markers and hope.
- Stage the resolved file:
git addtells Git the conflict is handled. - Continue the sequence:
git rebase --continuemoves to the next commit. - Abort if your confidence drops: Unclear history is worse than delayed history.
git rebase --abortis not failure. It's version-control hygiene.
When nested branches make things weird#
Basic tutorials usually assume one feature branch rebased onto main. Real teams often have stacked work. A bugfix branch may sit on top of another feature branch, which then gets rebased itself.
That's where people solve the same conflict multiple times.
Existing tutorials often miss those cases, even though 40% of “git rebase conflict” questions involve nested rebase scenarios, and understanding git rebase --onto can help avoid repeated conflict resolution in those situations, as described in this nested rebase guide.
A simplified example looks like this:
git rebase --onto main old-feature-base bugfix-branchThat tells Git: take the commits from bugfix-branch that came after old-feature-base, and replay them directly onto main.
You don't need --onto every day. But when branch stacks get deep, it's the command that separates controlled recovery from chaos.
Force-push rules that should be non-negotiable#
After rebasing a branch that's already on a remote, your local history no longer matches the remote history. A normal push will fail. That's expected.
Use:
git push --force-with-lease origin feature-branchNot git push --force.
Why? Because --force-with-lease adds a safety check. If someone else updated the remote branch and your local view is stale, Git refuses the push instead of unexpectedly overwriting their work.
For teams, this should be policy. If someone force-pushes plain --force to a shared branch, they aren't moving faster. They're gambling with other people's work.
Team Workflows and Documentation Best Practices#
A strong rebase branch in git workflow is less about command syntax and more about team agreements. Teams that handle rebase well don't just know the commands. They know when history is private, when history is shared, and who is allowed to rewrite what.
Rules that keep teams out of trouble#
Teams often improve immediately when they adopt a few explicit rules:
- Rebase before opening a pull request: Reviewers should read a clean branch, not your scratchpad.
- Never rebase shared long-lived branches:
main,develop, and other common integration branches should stay stable. - Use
--force-with-leaseonly when rewriting your own branch: Even then, tell collaborators if they're already watching that branch. - Prefer small, fresh branches: Long-lived branches accumulate conflict risk and stale context.
- Agree on branch ownership: If a branch is co-owned, stop treating it like a private branch.
The coordination side matters more than people think. Rebase is a social tool wrapped in a Git command.
Teams don't get burned by rebase because the command is hostile. They get burned because nobody agreed on branch ownership.
Why this matters for docs repos#
Documentation repositories expose every weakness in a sloppy Git workflow. MDX pages, navigation files, schema examples, changelog entries, and copied snippets all change together. If you keep merging noisy branches into a docs repo, the history becomes hard to audit and annoying to maintain.
A cleaner branch history helps with practical documentation work:
| Repo problem | What clean rebasing helps with |
|---|---|
| Small fixup commits everywhere | Reviewers see coherent content updates |
| Confusing merge noise | Maintainers can trace doc changes faster |
| Hard-to-follow rollback points | Teams can identify feature-level commits more easily |
| Ongoing docs refreshes | Authors work on top of the latest structure before publishing |
This is particularly useful for teams building developer docs, where code examples and prose evolve together. A tighter history makes it easier to understand whether a change updated behavior, corrected wording, or reshaped the information architecture. If your team publishes product and engineering content regularly, this overview of developer docs workflows fits naturally with a rebase-first habit.
It also affects onboarding. New engineers can read a linear docs history and understand how the product narrative evolved. In a repo full of merge noise, that same engineer spends time decoding branch choreography instead of learning the system.
If you're evaluating documentation platforms, this is also where operational simplicity matters. Traditional repo-heavy setups like Docusaurus can be powerful, but they often pull teams deeper into config and build plumbing than necessary. Mintlify offers a polished developer-docs experience, but some early teams still want more control over authoring speed, editing flow, and overhead. The best workflow is the one that keeps your team focused on shipping clear docs, not wrestling the toolchain.
For more hands-on examples, the Dokly YouTube channel is a useful place to see documentation workflows in action.
If you want a docs platform that keeps the publishing side as clean as your Git history, Dokly is worth a serious look. It gives founders and engineering teams a fast way to publish beautiful, AI-ready docs without the usual config burden, while still fitting the disciplined workflows that make rebasing worthwhile.